Claim a Free Estimate Today
Understanding garbage disposal types
Choosing the right garbage disposal starts with understanding the two main types available. Continuous feed disposals are the most common option in Florence homes, activated by a wall switch while water runs through the unit. They offer convenience for everyday kitchen cleanup, handling food scraps as you rinse dishes after family meals or when prepping ingredients for Sunday dinner.
Batch feed disposals require you to load scraps, insert a stopper, and twist to activate, offering an extra safety feature that many homeowners with young children appreciate. The choice between horsepower ratings matters too. A 1/2 horsepower unit handles light use in smaller households, while 3/4 to 1 horsepower models manage heavier loads and tougher food waste, particularly useful during holiday cooking seasons when Kentucky kitchens see more action. The grinding chamber material affects longevity. Stainless steel chambers resist corrosion better than galvanized steel, especially important in areas with mineral-heavy water. Noise insulation is another consideration. Multi-grind stages and sound baffles reduce the grinding noise that can echo through open-concept floor plans common in newer Florence developments.
Pre-installation preparation steps
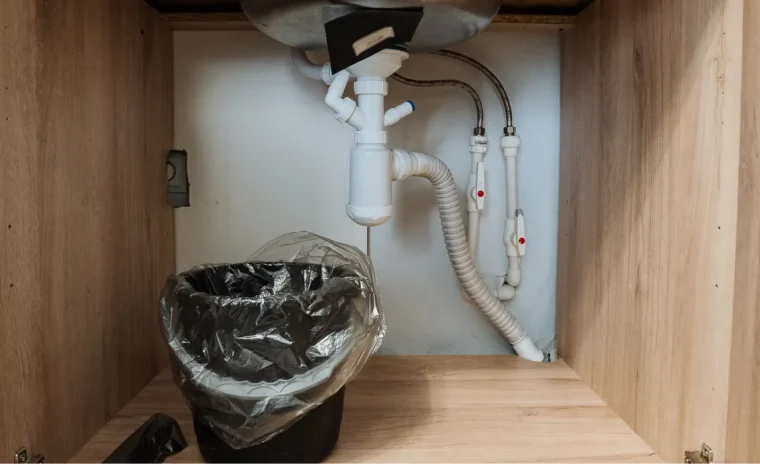
Proper preparation prevents installation headaches and ensures your new disposal works correctly from day one. Start by clearing everything from under your kitchen sink. You need room to work comfortably and access to all the plumbing connections. Place a bucket or large container under the existing drain trap to catch water that will spill when you disconnect the pipes.
Turn off power at the circuit breaker, not just the wall switch. Test the switch after to confirm power is off. Water supply lines should also be shut off at the valves under the sink. If your home lacks individual shut-off valves, a common situation in older Florence properties, you might need to shut off water at the main line. Check your existing electrical setup. Most garbage disposals require a dedicated 120-volt circuit. If you only have a plug-in connection under the sink, verify it is on a GFCI-protected circuit as required by current electrical codes. Hardwired installations need proper junction box access.
Measure your sink opening and the mounting assembly to ensure compatibility. Most modern disposals use a standard 3.5-inch drain opening, but older sinks may vary. Double-bowl sinks require consideration of which side will house the disposal and whether the drain configuration allows proper connection. Gather necessary tools before starting. You will typically need an adjustable wrench, screwdrivers, plumber’s putty, a hacksaw for cutting drain pipes, and possibly a socket wrench set. Having everything ready prevents mid-project trips to the hardware store when you have a disconnected sink.
Installation process overview
The installation process follows a logical sequence that builds from the mounting assembly up. Begin by removing your old disposal if replacing an existing unit. Support the disposal from below while loosening the mounting ring, as these units weigh 10 to 15 pounds and will drop when released. Disconnect the discharge tube and remove the mounting assembly from the sink flange.
Install the new sink flange using plumber’s putty around the underside rim. Press firmly into the drain opening, then from beneath, slide the mounting ring and snap ring into place. Tighten the mounting screws evenly in a cross pattern to ensure a level seal. Excess putty will squeeze out around the flange top, which you can wipe clean. Connect the electrical supply before hanging the disposal unit, as this is easier to manage without the weight in place. Remove the electrical cover plate on the disposal. If hardwiring, thread the electrical cable through the strain relief connector, matching black to black, white to white, and ground to the green screw. Wire nut connections should be tight and wires tucked neatly into the junction box before replacing the cover. For plug-in models, simply attach the cord assembly following manufacturer instructions.
Lift the disposal and align the mounting tabs with the mounting ring slots. Rotate the lower mounting ring until all tabs lock into place. The disposal should hang securely without wobbling. Attach the discharge tube to the disposal outlet, angling toward your drain trap. You may need to cut the tube to proper length using a hacksaw and deburring the cut edge. The P-trap connects the discharge tube to the drain line. If your disposal sits at a different height than the previous drain, you might need to adjust trap positioning or use different fittings. All connections should be hand-tight plus a quarter turn with a wrench. Over-tightening cracks plastic fittings. For dishwasher connections, knock out the plug inside the dishwasher inlet port on the disposal using a screwdriver and hammer. Connect the dishwasher drain hose using a hose clamp. Leaving the knockout plug in place is a common mistake that causes dishwasher drainage problems.
Testing and troubleshooting
Testing your installation thoroughly prevents problems and catches issues while tools are still out. Start with a leak check before running the disposal. Plug the drain, fill the sink with 4 to 6 inches of cold water, then release the drain while watching all connections under the sink. Look for drips at the sink flange, mounting assembly, discharge tube connections, and P-trap joints. A slow drip now becomes a bigger problem later. Tighten any connections showing moisture.
Once leak-free, restore power at the circuit breaker. Run cold water and turn on the disposal. Listen for unusual sounds. A properly installed unit runs relatively smoothly without grinding, rattling, or screeching. If you hear metal-on-metal sounds, something may have fallen into the grinding chamber during installation, or the unit was not mounted level. A humming sound without grinding action often means the disposal needs to be reset. Look for a red reset button on the bottom of the unit and press it firmly.
Test with actual food waste, starting with soft items like lettuce or cooked vegetables. The disposal should grind them quickly and flush away cleanly. Harder items like small bones or fruit pits test the grinding power, though you should avoid these during regular use. If the disposal jams, turn it off immediately and use the hex wrench socket on the unit bottom to manually rotate the grinding plate and free the jam. Most disposals include this wrench, or you can use a standard hex key.
Check the dishwasher connection if applicable. Run a dishwasher cycle and verify water drains properly through the disposal. Standing water in the dishwasher after a cycle often indicates that knockout plug was not removed from the disposal inlet. Water backing up into the sink during disposal operation suggests a drain line restriction further downstream. The disposal itself works fine, but the existing drain piping cannot handle the increased water flow. This situation is more common in older Florence homes where drain lines may have sediment buildup or inadequate slope.
When to call a professional
Some installation scenarios are better left to trained professionals who handle them daily. If your home lacks a disposal and needs new electrical wiring run to the sink location, that electrical work requires expertise and often permits. Running a new circuit from the breaker panel through walls involves code compliance issues beyond basic disposal installation. Similarly, if your sink drain configuration needs modification, such as drilling a new disposal opening in a sink that never had one or reworking drain lines with incompatible fitting sizes, professional help saves time and frustration.
Homes with septic systems need special consideration before disposal installation. While modern disposals can work with septic systems, they increase the solid load and may require more frequent pumping. A professional familiar with local septic systems can advise whether your system can handle a disposal and what type works best. In the Florence area where both municipal sewer and septic systems exist depending on neighborhood, this guidance prevents future septic problems.
Complex plumbing situations like cast iron drain lines, undersized drain piping, or significant drain slope issues benefit from professional assessment. What seems like a simple disposal installation becomes complicated when the existing plumbing cannot support it. Older homes may have drum traps instead of P-traps, or drain lines that do not meet current code for size and venting. A professional identifies these issues upfront rather than discovering them mid-installation.
K Ziegler Plumbing brings three decades of experience to garbage disposal installations throughout the Florence area. We have worked with every sink configuration, plumbing setup, and home age you can imagine. We know which disposal models hold up best in local water conditions and which installation approaches work for different property types. Our installations include proper electrical connections, code-compliant plumbing, and thorough testing before we consider the job complete. If you are uncertain about any aspect of disposal installation, or you simply prefer having it done right the first time without the trial and error, give us a call. We are happy to answer questions, provide a quote, or schedule installation at your convenience.